Flixel Tutorial - 6 Steps to Creating Your First Cinemagraph
Flixel Living Photos
The breathtaking, subtle movements. The cinematic feel and attention to detail. Yes, these would all accurately describe the characteristics of a cinemagraph, but don't let that intimidate you! Cinemagraphs are taking the social and digital media world by storm, so why not try making one yourself!New to cinemagraphs? No worries. This step by step guide will help you create your own work of art. The site used for this step by step is Flixel- check out their website if you want to learn more! They also offer a free trial if you're first time user!
Let's get started!
Step 1
Open up Flixel and create a new document. Upload the video that you want to create your cinemagraph from.
Step 2
Adjust the frames of your video, choosing a start and ending point. You can also make a still frame. The frames can be up to 10 seconds in length.
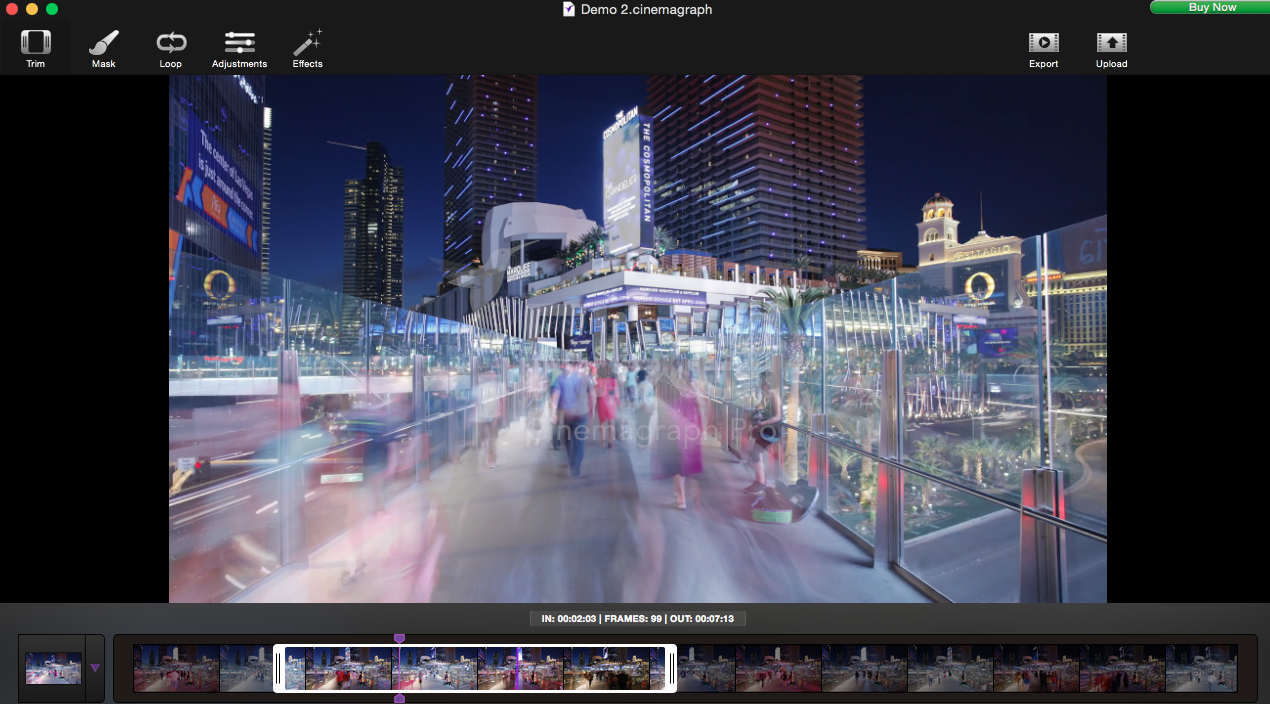
Pro Tip: Make sure that the camera you're using is on a still and steady base when filming, a tripod is a great option!
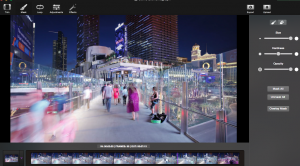
Step 3
Now it's time to mask your photo. Choose your size, hardness and opacity of your brush. Then mask (drag your brush) over the section of the photo you want to have in motion.

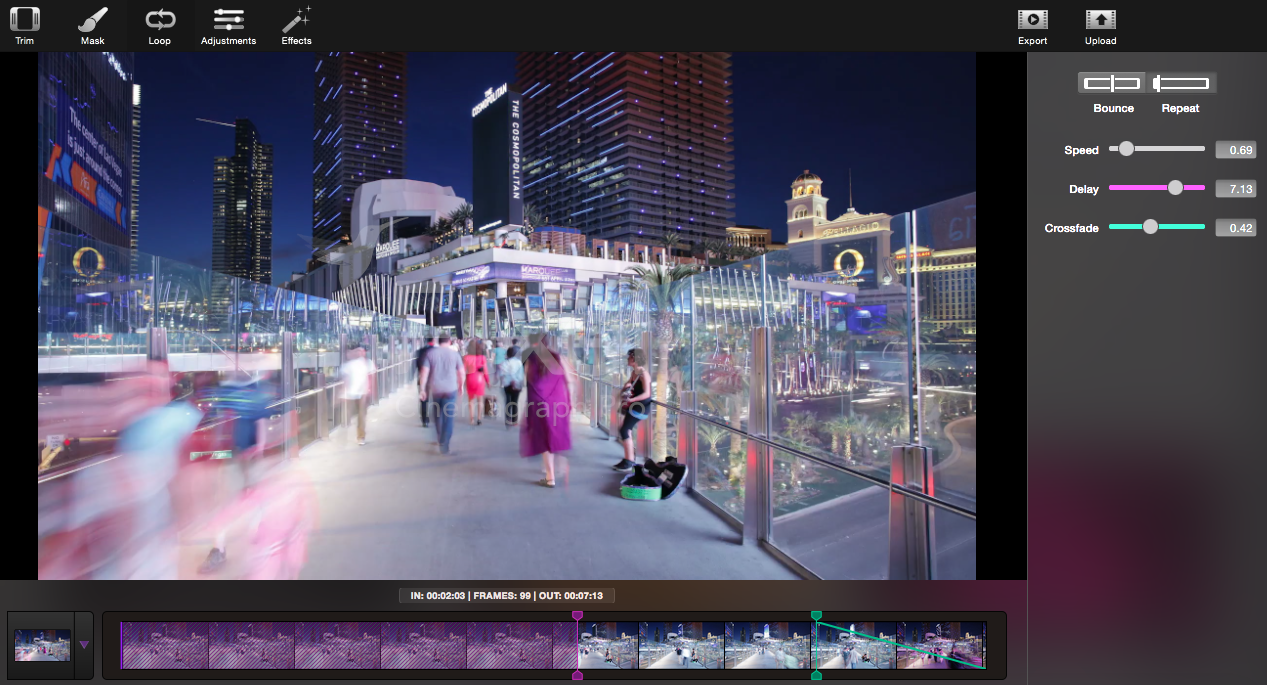
Step 4
Once you've masked your image, you can adjust both the speed, delay and crossfade of the section in motion.
Step 5
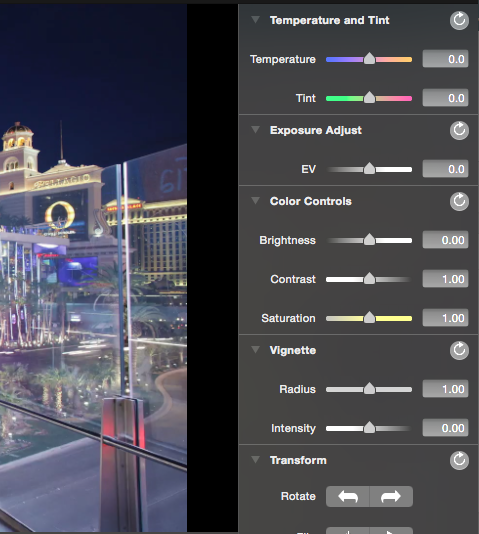
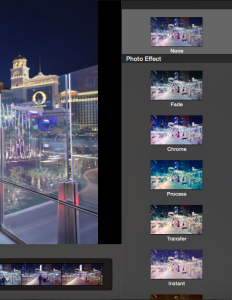
If you want to add some more technical adjustments, you can play around with alterations such as contrast, saturation, and temperatures (just the tip of the iceberg). Flixel also offers a wide variety of different filters if you are looking for a more stylized look.
Step 6
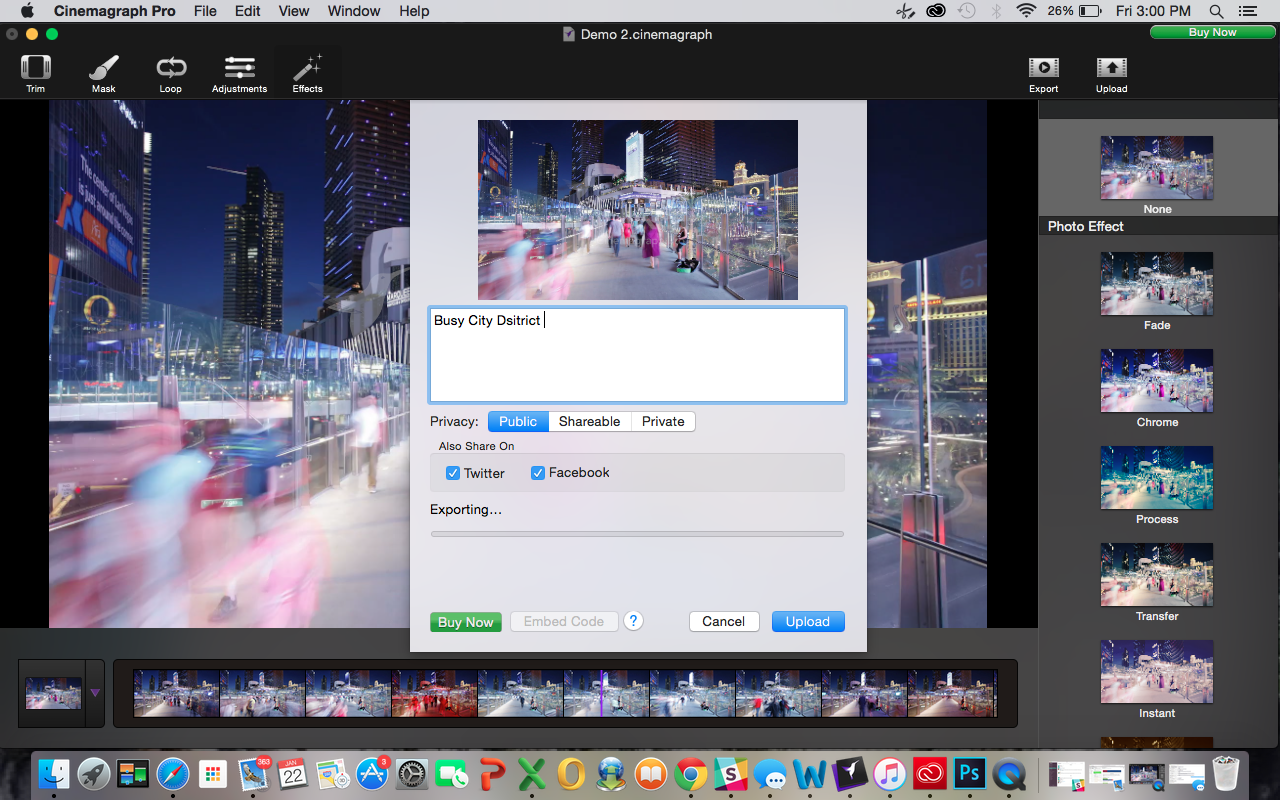
Share it! Upload your masterpiece to Flixel.com, and upload it to social networking sites like Twitter and Facebook at the same time. This also gives you a chance to name your cinemagraph and edit it's privacy settings.
Looking for some inspiration?
Check out our recent blog 5 Favourite Cinemagraphs
Manage all your clients with one social media scheduler. Every HeyOrca plan comes with unlimited users. So you can build communities and client trust – without being penalized for growing your team. Sign up for a personalized tour of HeyOrca for free (and enjoy special agency pricing and perks when you subscribe).
Every member of your team deserves a seat at the table. That's why every HeyOrca plan comes with unlimited users. Choose the social media scheduler that helps you create, collaborate, and build community – without worrying about extra fees. Start your free trial.
Looking for the best social media management tool for your team or agency? Hi, we're HeyOrca: the all-in-one social media tool that comes with unlimited users. Start a free trial today. No card required.
You found it: the best social media tool for teams and agencies. Every paid HeyOrca plan comes with unlimited users. So you can create content, build communities, and report on your success. All without sharing passwords or paying extra for per-user pricing. Try HeyOrca for free today.


.png)

%20(2).png)


.png)
.png)